Buried pipes are, by their nature, generally inaccessible. Their earthen cover provides shielding from most accidental damage and weather and temperature extremes. But, sooner or later, buried pipes will require maintenance or replacement, and then their shield becomes their Achilles’ heel.
The previous, traditional approach to both spot repairs and restoration of lengthy deteriorated segments was to dig up the pipe and fix the problem. Excavation was messy, disruptive to nearby and competing activities, and could take a lot of time. Each of these added to project costs, which in turn reduced the total length of pipe that could be restored in this manner — in a season or for a single project.
In the late 1960s, the idea of repairing or restoring a pipe from the inside began to take hold. About that time, the first patents for pipe lining equipment were issued. The repair strategy started in Europe and made its way to the U.S. in the mid-1970s, but its use wasn’t widespread until the 1990s.
Planning and reconnaissance
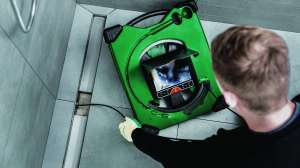
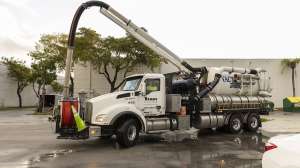
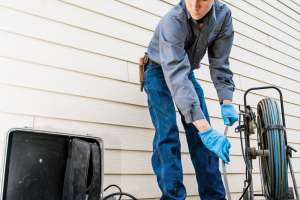
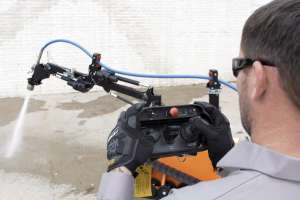
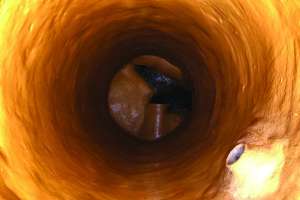
Before a liner can be inserted, the existing pipe must be cleaned and inspected. CCTV is used to determine the type of preparations needed. “Preparation can range from simple flushing to a hard and aggressive cleaning,” explains Mike Burkhard, executive director of business and technology development at Reline America. “In some cases, root and obstruction removal may be necessary. Severely deteriorated or partially collapsed areas must be evaluated for their ability to withstand and/or accommodate the introduction of a new pipe, but even partially collapsed pipes can sometimes be relined.”
The new pipe material must be flexible enough to be inserted into an existing pipe, but strong enough to provide structural strength and good flow characteristics once cured. It also must be impervious and resistant to the nature of the materials it will carry.
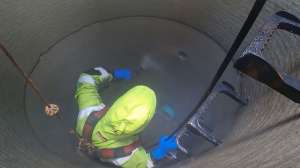
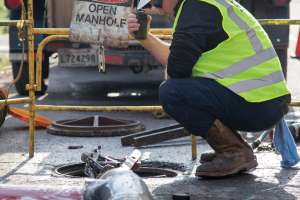
Manholes are the logical beginning and end points for liner installation. Pipe joints at the manholes and any midrun lateral connections, once restored, must be properly sealed. External groundwater must be kept from infiltrating wherever the new liner is joined to an existing lateral. Likewise, the surrounding environment must be protected from leaks.
Because every pipe segment is unique, there are few hard and fast rules in the relining industry. The door to a successful job is opened by a comprehensive understanding of the conditions that must be overcome and the use of proper materials.Installation methods
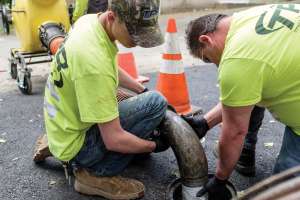
Once selected, the new liner material must be cut to length to reach from one manhole to the next, then wetted, and pushed or pulled into the host pipe. Two different and equally effective processes have been developed to accomplish this task.
The pull method uses a stout rope or cable that is inserted at a manhole and advanced downstream until it reaches the next manhole, where it is secured to the end of the liner. The rope pulls the attached liner upstream, first entering through the introduction manhole, then the pipe segment, and onward to the manhole through which the pull cable was inserted. Secured at each end, the liner is then inflated against the receiving pipe.
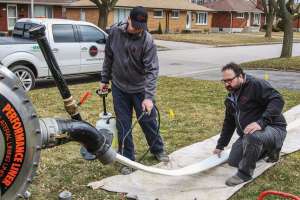
The inversion method uses compressed air or water to push the liner into the receiving pipe. One end of the liner is attached to a collar-like device at the insertion manhole. As air or water are introduced, the fluid “pushes” the liner to the next manhole. As it advances, the liner is turned inside out; this action is the genesis of the process’ name. When the liner protrudes into both manholes, it is trimmed, secured at each end, and inflated against the receiving pipe.
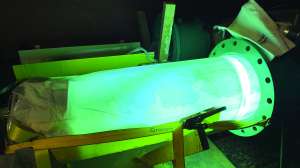
Once the liner is in place, it is cured, transforming the flexible liner into a rigid new pipe within the original pipe. Hot water, hot air, steam, pressurized ambient air or exposure to ultraviolet light are the primary curing methods. The process is selected based on the liner material, the resin and its chemical properties, and pipe diameter.
Materials
The liner itself may be made using a woven or “felting” process. The most common liner base materials are polyester and fiberglass. Lynn Osborn, P.E., a technical director for NASSCO, explains “Felting is a textile production process that uses repeated partial insertion and removal of barbed felting needles into several layers of unwoven base fiber. As the needle is withdrawn, it pulls the fibers of one layer into the next.” Felt, unlike woven textiles, will not rip along a grain line, typically known as the weft line.
During fabrication, a liner starts out as a long rectangle. The two long sides of that rectangle must be joined together to create a high-strength, fully sealed seam. With the two sides overlapped, multiple lines of stitching may be used to retain consistent mechanical performance around the liner’s circumference. Another process is to butt stitch the two sides together without overlap. Some liner tubes are fabricated by gluing the two sides together. Regardless of the joining process, when inflated, the flat rectangle becomes a cylinder.
Additional woven or felted layers or a jacket of plastic film may be used to address specific conditions in the host pipe. Some manufacturers apply a thermoplastic coating for certain applications. These techniques are aimed at making the wetted liner easier to insert into the receiving pipe or to achieve smoother bends. Transition liners are available for pipes that change diameters midrun.
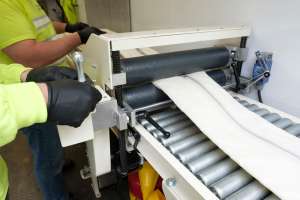
Before installation, the liner tube must be impregnated with a catalyzed resin. This process is called wetting or wetting out. Wetting can be accomplished in the liner fabrication plant or similar processing facility. These “pre-wetted” liners are sent to the job site in a sealed container to preserve the materials. Wetting can also be accomplished in a purpose-built truck on the job site. In that situation, the wetted pipe leaves the prep area and is immediately inserted into the receiving pipe.
“The dimensions and weight of the folded or coiled ready-to-install liner combine to influence the selection of the wetting facility and its location,” Osborn says.
Vinyl ester, epoxy and polyester resins are cured with steam, or hot or ambient temperature air or water, adds Burkhard. Styrene-based wetting agents have found favor for use with liners intended for sewer line restoration. Regardless of the resin selected, the curing process makes the resin material rigid and preserves the inflated liner’s shape.
Lateral connections
Laterals that were sealed shut during relining must be “reintroduced.” First, these connection points must be located and the newly cured lining must be drilled, ground, routed or otherwise removed. Sealing these reconnected laterals presents a different set of challenges.
Working from within the larger pipe, a short, T-shaped liner (sometimes called a top hat or stove pipe) can be inserted into the lateral. This liner must sufficiently overlap the main liner and extend into the lateral to bridge any gaps and create a good seal against infiltration and exfiltration. In problematic situations, the surrounding soil can be grouted to supplement the internal-connection approach. Grouting can also be done from within the pipe.
Pros and cons
Compared to the traditional dig-and-replace approach, most CIPP jobs are planned to enable one or more relined segments to be completed in a single day. A single day disruption is more palatable to customers.
When relining is between manholes or similarly accessible points, it may be possible to avoid all excavation. Plugging an upstream sewer main can create some customer concerns, but a well-planned notification process will go a long way to minimize complaints. Manhole-to-manhole work significantly minimizes traffic disruptions as well.
Both pressurized and gravity-flow segments must be impervious at both ends and where laterals connect to the new liner. Groundwater must be protected from exfiltration of the conveyed fluids, and the system must be sealed against infiltration.
The largest-diameter pipe that can be successfully lined with current processes is about 10 feet while the smallest is about 2 inches. With few hard rules, these limits are related more to liner fabrication and insertion limitations than they are to liner performance. Preserving flow capacity to convey fluids appears to be the greatest small pipe challenge. When lining extra-large-diameter pipes, the challenge is the enormous weight of the liner itself and its coiled or folded size, both of which affect transportation options. “In the end, the liner itself may limit the situations in which it is a viable solution,” Osborn says.
Continue reading for free