As the name suggests, Quick-Lock mechanical point repair sleeves solve pipe rehabilitation problems safely, reliably and quickly. Point repair sleeves address common pipeline concerns like infiltration, circumferential and longitudinal cracks, holes, and offset joints, but without the lengthy time needed for CIPP and grout methods. Sleeves can also be installed serially when appropriate.
Before getting started on a Quick-Lock installation, be sure to have your PRT Installation Logbook for Mechanical Point Repair handy to document the entirety of the rehabilitation process for future reference.
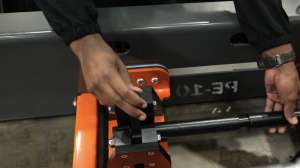
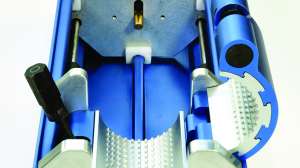
First, prepare the sleeve by cutting off the tape and lubricate the locks and metal overlap. This will help ease the locks into place once the packer has been expanded within the pipe. Then put the rubber seal on the sleeve. If it’s a single-sleeve installation, trim the excess rubber. Next you will need to prepare the packer by connecting it to the compressor with the air hose. The sleeve should be placed on the packer with the flare end against the flow. Slide the sleeve to the edge of the laser. Inflate the packer until it’s snug in the sleeve and note the psi; then shut off the air valve on the packer and disconnect the air hose.
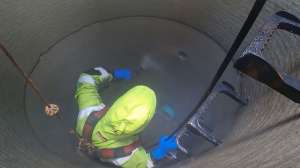
After the preparatory work has been completed, it’s time to get the rehabilitation off the ground — or in this case, into the ground. Carefully lower the packer, crawler and push bar into the manhole. Then begin connecting the pieces: Attach the packer to the crawler adapter with the push bar and the air hose to the other side of the crawler adapter. Charge the air line to the appropriate psi that was established earlier. Then re-open the air valve on the packer and double check the position of the sleeve on the packer with the assistance of the CCTV visual. Repeat these three steps as necessary until the sleeve and packer are in the correct position.
Now installation can begin. Drive the packer to where the laser meets the edge of repair and then center the sleeve on the repair a final time. Re-pressurize the packer to the determined psi. Finally, deflate the packer and count the teeth on the locks. If the front and back differ by more than three teeth, perform re-inflation at each lock. This ensures the Quick-Lock repair sleeve will stay securely in place.
Some safety notes: Never apply more than 15 psi to a packer above ground. Doing so can result in serious bodily injury or death. There are hazards involved in mechanical point repair installation, so rehab workers are encouraged to seek on-site training before installing Quick-Lock on their own.
The Installation Logbook for Mechanical Point Repair is designed specifically for Quick-Lock, so consult the manufacturer’s instructions if using an alternate solution. Need a logbook? Get your free copy: Request now.