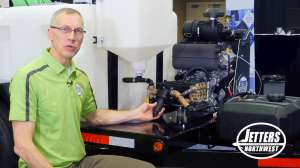
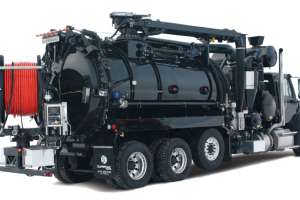
Vacuum tanks are subject to significant stress as you load and unload wastewater and debris. Failing to properly maintain them can lead to serious problems.
Constant changes in pressure and vacuum, combined with the sludges, grit and other foreign objects passing through the valves, can weaken many points in the tank. So, it’s important to clean out the tank regularly and go beyond your quick daily visual inspection.
To get started, check vacuum gauges to verify all the stored energy has been released. This means there is no pressure or vacuum stored in the tank. Be sure to put the pump into neutral to dump vacuum or pressure. You can also open the load valve to equalize the pressure and release stored energy.
Vacuum and pressure gauges: Not much goes wrong with these. Clean the glass and make sure gauges haven’t been damaged by low-hanging branches as you negotiate driveways.
Manways: Before opening the manways, check tank gauges to be sure the tank is not under pressure or vacuum. Serious injury or death can result if this precaution is not taken. While most manways are operated manually, there are a few different options including pneumatically operated units. When opening the manway, check the gasket for wear. Look for chunks that are missing or dried out as well as brittle O-rings. Replace the gasket and O-rings as needed. For a steel tank manway, use a wire brush to clean debris away from the sealing edge to create a more airtight seal. Leave manways open throughout the inspection.
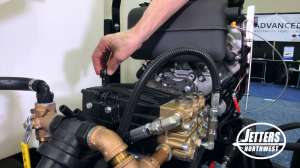
Primary and secondary valves: While the pump is pulling vacuum, sewage must never enter the pump. If by some off chance the primary and secondary valves fail and sewage is allowed to enter the pump, the safety coupler is designed to break and save the pump. That’s if you’re lucky. Unlucky would be vanes breaking in the pump or the pump “grenading.” Grenading is where the vanes not only break, but they also explode out of the pump casing and send parts flying everywhere. This is a violent and dangerous explosion. Never remove or bypass these safety components that protect your pump.
Typically, five wing nuts hold down the primary valve, which is usually located along the top of the tank near the front. You’ll open these like you would the manways and clean and inspect the gasket, replacing as needed. A cage holds a steel or plastic ball. This ball is designed to stop vacuum to the pump in case the tank is too full and to prevent sewage from entering the pump and causing expensive damage. Be sure the ball is not dented and the cage is clean. Cleaning wipes can lodge in this area and cause problems.
The secondary valve is connected to the primary through vacuum pipes and plumbing, typically with three wing nuts holding the cap on. Remove the cap and take care of the gaskets and sealing surfaces. Check the steel or plastic ball, and replace as needed.
Prefilter: Some people choose not to use a prefilter on their pumps. Most have the traditional setup utilizing the primary shut-off valve, secondary shut-off valve, and then the pump. From time to time, a piece of gravel or rust will come through the safety valve and the debris will go through the pump. A prefilter offers added protection to keep debris out of the pump. If you have a prefilter, remove the screen, hose it off, and replace it as part of your maintenance protocol.
Check baffles and welds: Here’s where confined-space safety precautions come into play. Follow the appropriate procedures, and if you’re not clear about them, stop the inspection now and get familiar before proceeding. Enter the tank to inspect the integrity of baffles and welds. Make sure they are not separating. A dropped baffle can make it very difficult to off-load and can be very messy. And baffles add crucial structural strength to your tank when it is under vacuum.
Oil-catch muffler: This muffler catches exhaust from the pump and collects the oil used by the pump. Drain this daily to avoid leaving oil spots on driveways or an oil blast mark.
Wrapping up
After the tank inspection, close manways and valves. Turn the pump on, and pressurize the tank. Check for leaks and tighten seals as needed. Check pressure and vacuum relief valves to make sure they are opening at the pump/tank manufacturer’s recommended settings.
Run the pump to check that the oilers are functioning properly. Look for about a drop a second at operating speeds. I highly suggest getting automatic oilers. My first vacuum truck had manual oilers. I would set my oil speed at a drop per second, but after 30 minutes of pumping, it would be running too fast. Automatic oilers maintain the preset speed the entire job.
Shut the pump down and put the three-way valve into neutral. Verify with the gauges that there is no stored pressure or vacuum. Check to be sure the valve operates without binding and excessive force needed to operate. Also, make sure there are no leaks; tighten as needed. Tanks in colder climates often have heated valves, which are warmed by the engine coolant. Be sure to inspect these hoses.
Inspect steps and handholds to make sure welded points are not starting to crack. Also check that antislip surfaces are gripping. Look for signs of cracking and leakage around plumbing joints from the tank to the pump, all the way through the three-way valve to the exhaust. Address any problems you find.
Continue reading for free