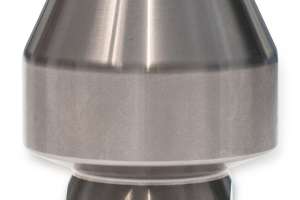

Without question one of the most popular tools in the industry and on our shelf are Warthog nozzles. When powered by the right jetter, Warthog nozzles can cut out root masses as well as hardened grease and other tough buildup. If you purchased your jetter from Jetters Northwest, there is a good chance you already own and use one or more of these valuable tools.
Jetters Northwest wants to ensure that those of you who own a Warthog nozzle are getting the most from your investment; especially the WT, WS, WH, WG and WX (aka WTA) models that have viscous fluid inside (you might call it oil); the viscous fluid has two very important purposes:
- The viscous fluid lubricates the Warthog's internal parts. This is obviously essential to the life of your Warthog nozzle.
- Being extremely thick, the viscous fluid also reduces the Warthog's rotation speed so that its water jets have maximum impact as they tear into the blockage or buildup (this is what is called controlled rotation speed). Fast rotation tends to skim over tough buildup, while slow rotation allows the water jets to penetrate deeper while ripping through roots and buildup.
NOTE: The small WV-1/4 Warthog nozzles do not have viscous fluid inside; just use a good spray lubricant like WD-40 after each use to lube the rotating mechanism inside and out. Spraying down the WV also helps prevent surface rust and flush away debris.
There are two critical maintenance components to keeping your Warthog at its full performance.
1. Routinely inject fresh viscous fluid into your Warthog nozzle.
This must be done on a regular basis to clear any contaminants from inside your Warthog's bearing housing and to purge any water and air bubbles from the bearings.
We recommend you do this routinely every week if you use your Warthog on a regular basis. Further, the manufacturer recommends you fully replace the viscous fluid every 40 hours of use. Note: If water gets purged from the Warthog every time you inject fluid, it is likely time to replace the high-pressure seal inside the Warthog.
To inject and/or fill Warthog WT, WS and WX models with viscous fluid you will need a Warthog Lube Kit which includes the viscous fluid and the injection tool. The larger WH and WG classic models don't require the syringe tool; you simply remove the inlet fitting from the Warthog, drain the old fluid, pour in the appropriate "fast" viscous fluid, then reinstall the inlet fitting.
Here are basic instructions for injecting viscous fluid into WT, WS and WX models:
- Fill the syringe with appropriate viscous fluid ("slow" fluid for the WT and WS, "fast" fluid for the WX). This is best done by unscrewing the handle from the syringe tube and pulling out the plunger. Pour in fluid until the tube is about 3/4 full, then reassemble the plunger into the syringe.
- Hold the Warthog with the inlet end up. Remove the port screw (requires a flathead screwdriver) from the Warthog. Thread the syringe fitting into the port, then slowly squeeze the syringe to force fluid into the Warthog until excess fluid comes out around the water-inlet end. This can take some effort to force in the new fluid, especially if the nozzle and new fluid are cold. If the fluid coming out appears dirty, watery or aerated, keep squeezing in new fluid until it comes out clean and clear. (Tip: Many techs store their spare viscous fluid in the cab to keep it warmer).
- Remove the syringe from Warthog and re-install the port screw (check that the o-ring is intact on the screw before re-installing).
2. Check the Warthog's orifice jets regularly to make sure they're not plugged up or worn out
A plugged orifice is a huge loss of jetting efficiency as it eliminates the water jet cleaning power of that port. This also throws the Warthog out of balance in the line you’re trying to clean. An easy and routine way to check for plugged jets is to do a visual "fountain test" each time you pull the Warthog from the pipe after you've shut down: as you pull any nozzle out of the line, let it dangle and look at its orifices — you should see residual water "fountain" up from the orifices. If one or more orifices does not fountain up then it is likely plugged. If none fountain up, hold the hose from a higher point; this often allows more residual water to flow down to and through the nozzle.
Worn-out orifices are also a huge loss of jetting efficiency. The high velocity of water leaving the orifice gradually wears grooves and channels into each orifice, which turns a sharp and cohesive water jet into more of a spray or even a weak mist. Effectively your water jet "knives" have become dull. The best way to check for this is to routinely test your Warthog above-ground where you can see the actual water jets launching from the nozzle under pressure — the water jets should carry as a good, long stream without quickly turning to mist. Warthog users often securely strap or zip-tie the hose end to a heavy pallet or chain-link fence to keep the nozzle from flailing around while also allowing it to rotate freely. Safety first: Make sure the Warthog is 100% secure in place and that all persons and property are clear of the range of the Warthog's water jets.
This is also a good time to observe and listen to the rotating action of your Warthog to ensure that it still rotates slowly; it should sound somewhere between the chopping sound of a helicopter and the chugging sound of an old-time locomotive. If the Warthog sounds more like a "buzz" it's probably running too fast and needs new viscous fluid asap. If it barely rotates or stalls then it might be time for new bearings in your Warthog, which are included along with new high-pressure seals and other parts in the Warthog Overhaul Kit that is appropriate for your Warthog model.
Additional important warthog maintenance checks
For WT models with the carbide inserts around its body, now is a good time to check the carbide inserts and their retaining screws for tightness. You can remove loose screws and reinstall with a drop of Loctite 242 (removable) or similar thread-lock, which helps keep them secure.
For WS and WX models this is a good time to look at the condition of the rotating head, and the inlet whip hose (if equipped). Replace the whip hose if damaged or kinked. If the head is so worn down that the hex of the orifice tips are also wearing then it is time to replace the head.
A few final Warthog tips
- Listen to the sound of your Warthog's rotation – its rhythm. A change in cadence is the first sign something is not right.
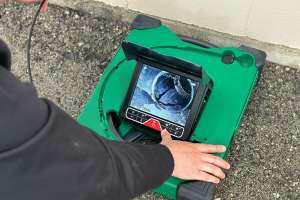
- Look at cleaning patterns left behind with your camera. Incomplete coverage will tell you your tool is rotating too slow, or not at all, or possibly that you are moving the Warthog through the pipe too fast for effective cleaning.
- Warthogs (and all nozzles) are not nearly as powerful when working underwater. If possible, punch through any full blockage first to decant water from the line.
- For root cutting, let the Warthog go past/through the roots and then use its rear jets to cut out remaining roots as you pull the Warthog back. The two rear jets are larger and more powerful than the single front jet, and since there are two rear jets the roots get hit two times per rotation. This speeds up the root-clearing process and simultaneously scours the pipe wall.
Warthog maintenance manuals and info can be found at the Warthog website , and video tutorials are also available on the Warthog YouTube site.
Warthog lube kits, repair parts, and complete nozzles are available at jettersnorthwest.com or give us a call at 877-901-1936 and we will match the right kit to your Warthog.
If you have any questions or comments regarding this blog, please feel free to call or message us. Also, your comments are always welcome. If you would like to share with us how jetting has impacted your business go to our contact page and let us know, or connect with us via Facebook.
Get Jetting!